

16 Apr Case Study: Wildlife Pond Construction
Pond construction is one of our favourite jobs at Holland Landscapes. In this article we’re showcasing one of our more challenging – and rewarding projects. A large wildlife pond near Frinton on Sea in Essex.
One of the strongest gardening trends at the moment, is hard landscaping. We’re busy installing driveways, patios, paths and decking for lower maintenance gardens that can be used all year round. And we love doing that. It’s great to work with different types of hard landscaping surfaces. These days there are so many to choose from and the effects when they are mixed and matched are simply spectacular.
However, in our hearts, everyone in the Holland Landscapes team are landscape gardeners. We love the strong structures that define and shape outdoor spaces. But we love plants more. So when we were asked to get involved in a wildlife pond construction, there were big smiles all around.
Before the new wildlife pond construction project began
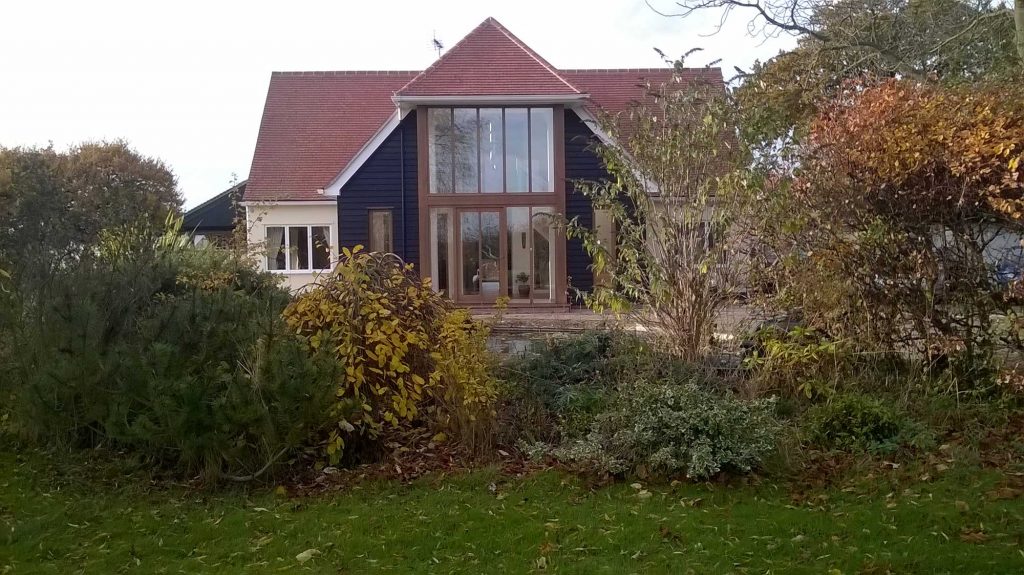
This beautifully maintained house near to Frinton on Sea in Essex sits in a large garden at the end of a sweeping drive. Existing planting was partially obscuring the building – but not in a good way. Shrubs were a little overgrown and while there were some interesting shapes to them, they offered neither screening nor beauty. Our first job was to remove tired vegetation and open up the view from that beautiful picture window to the orchard beyond.
Step 1. Dig a big hole and then drain it
So much of a landscaper’s job is akin to civil engineering. Particularly on the heavy clay soils of Essex and Suffolk where drainage and drought can cause opposing problems in the same garden, depending on what the weather is doing that day.
Because of the soil levels and the soil type in this garden. We decided to install a drainage system beneath the pond in order to manage the risk of pond hippoing. Hippoing is not something I’ve ever seen mentioned on TV gardening shows, or indeed in the gardening magazines. It is however, a very real, and very unsightly phenomenon.
Pond hippoing happens when groundwater or gas is trapped and accumulates between the pond liner and the ground below. The pond liner is pushed up and out of the water until it looks like there is a hippo in the pond. Proper pond construction, particularly when the project is as large as this one, mitigates against hippoing.
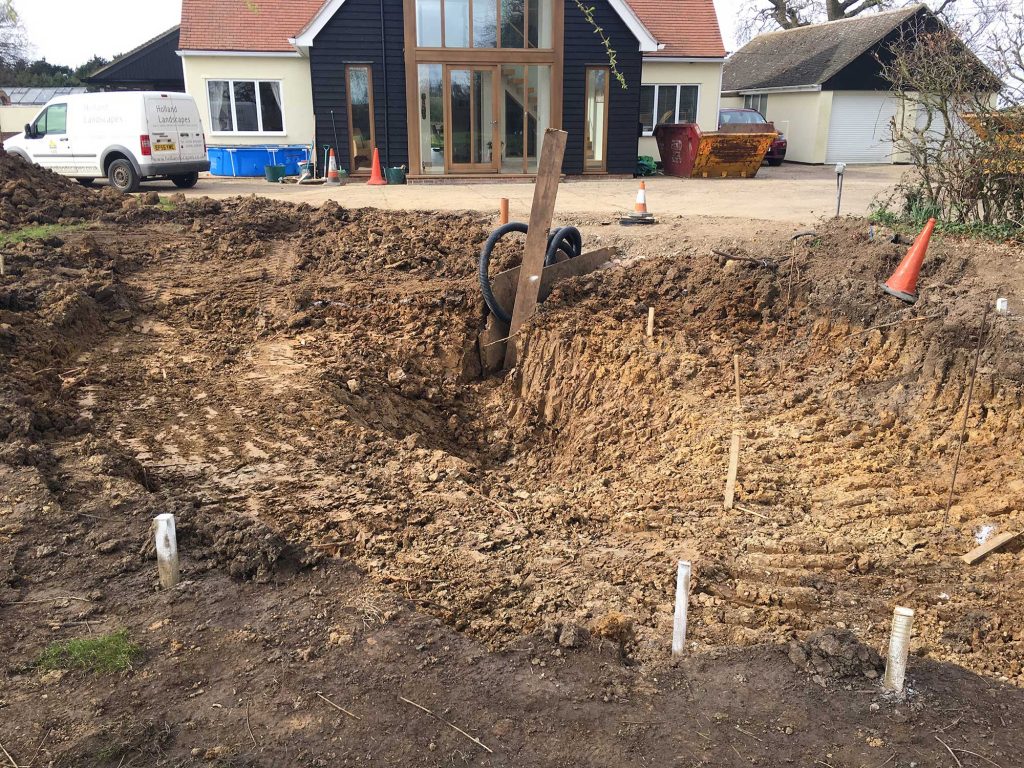
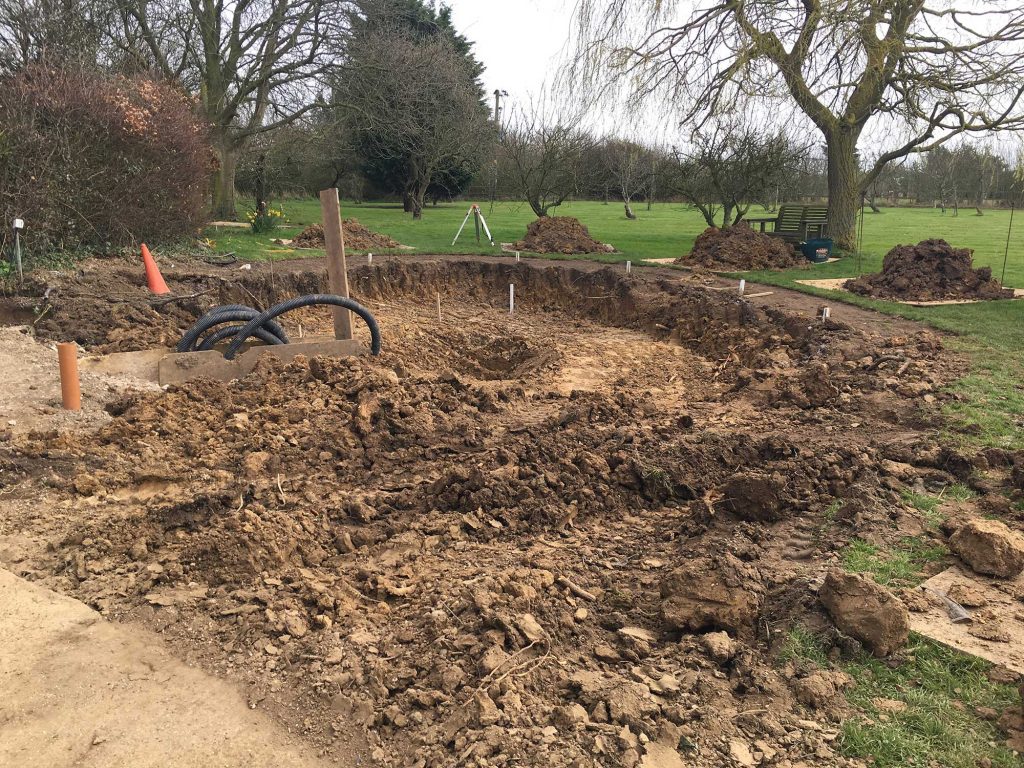
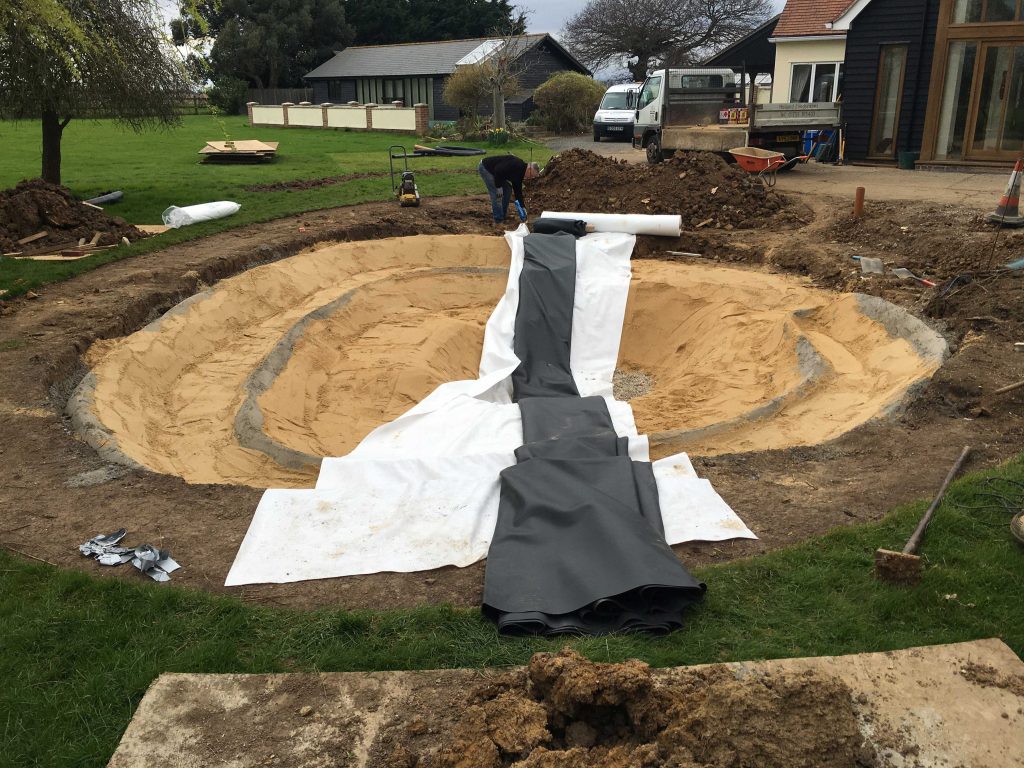
In this picture you can see that the main part of the pond has been excavated and a drainage system installed to alleviate pond hippoing. The pipe is attached to a pump which can remove excess water from undeneath the pond liner. You can also see what the natural soil is like in this part of Essex. It contains a high proportion of clay which does have some good points, but you have to know how to work with it.
Step 2: Shape the contours of the pond
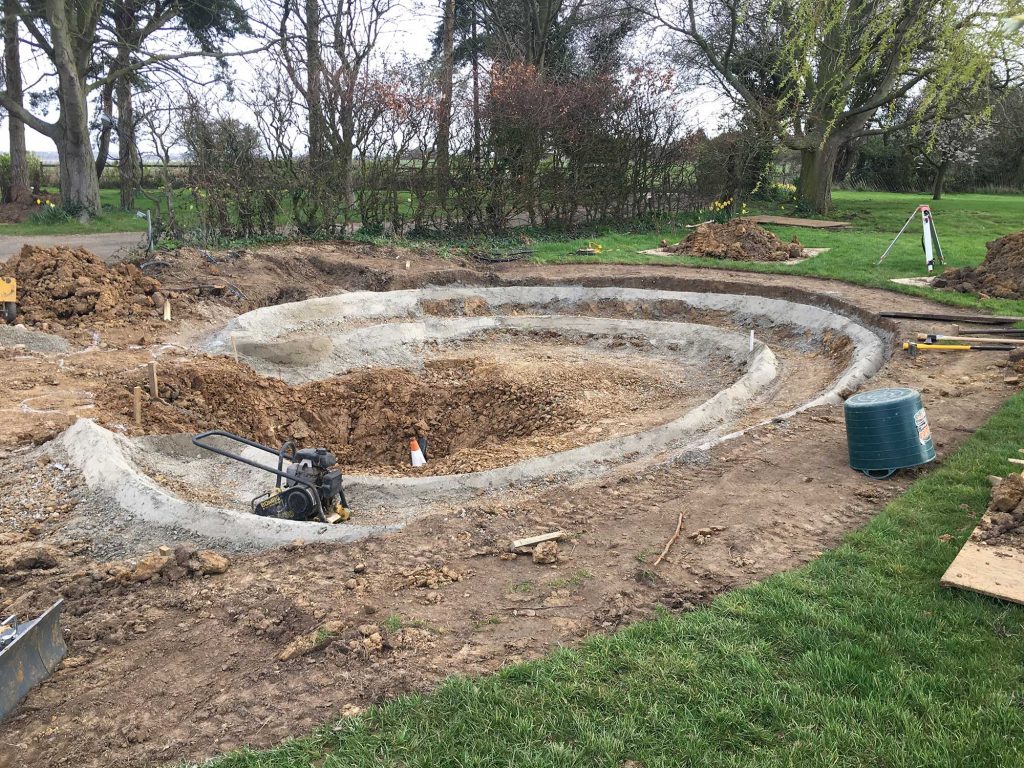
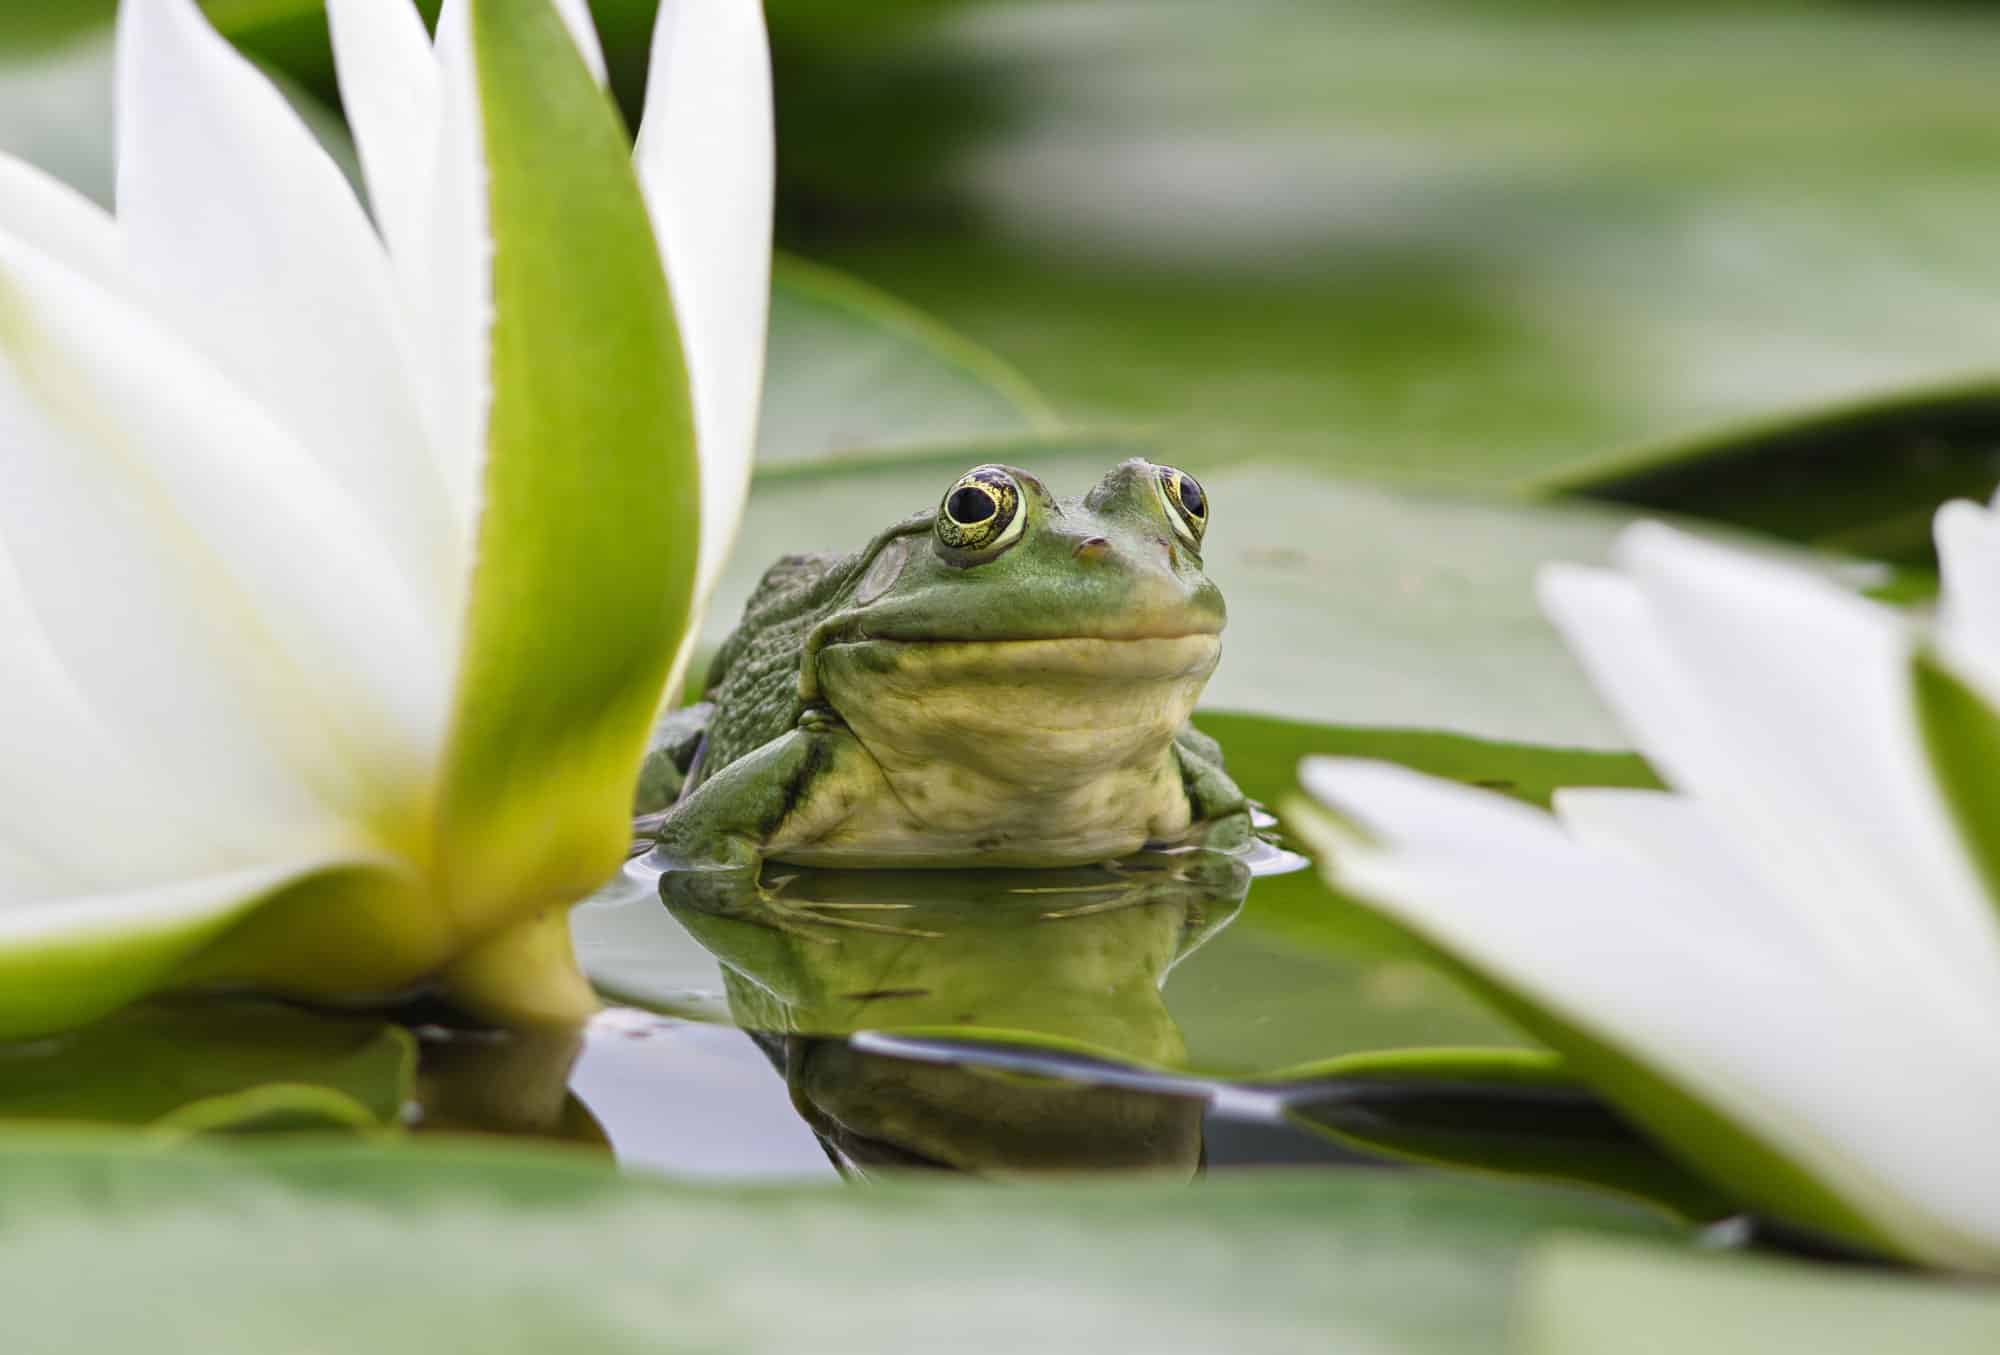
An effective wildlife pond, one that supports a broad spectrum of plants and creatures, has different depths and underwater contours. Pond plants, just like their landbased cousins, like different conditions. So whilst that old favourite, the water lily, likes to be in deep water, sedges, reeds and iris like to grow in the shallow water. You can see in this image that we’ve shaped a series of shelves so that we can introduce lots of different plant species.
Remember too, that wildlife appreciates having different depths of water. Young fish and tadpoles like to stick to the shallower pond margins whilst bigger fish will submerge themselves in the cooler depths in the middle. Probably hoping to hide from predators.
At the same time as creating varying depths for planting and wildlife. Our team had the challenge of making sure the top of this wildlife pond was completely level. Have you ever seen a wonky pond? I have and it’s not pretty. As my Dad always says, water doesn’t lie. The slightest slope in a pond leads to exposed liner on one side. And trust me, it’s never a good look.
Whilst we’re still with this picture, take a peek at the hand tools in the foreground. They’re testement to the soil conditions here.
Step 3: The exciting bit in pond construction. Making it waterproof
The heavy duty butyl liner for this wildlife pond was custom made so that we wouldn’t have to be messing about with sealants or trying to join pieces together. It’s great quality, but my goodness it was heavy. Measuring and calculating the amount of pond liner needed required quite a bit of brain power. With patio slabs or turf it’s easy. Multiply the length of the area by the width and the job is done. With pond liner you have to take into account the depth and the contours too.
If you don’t order quite enough pond liner, it will be impossible to anchor it around the sides of the finished pond. If you order too much, you risk blowing the budget and worse – sending the excess to landfill. Wildlife pond construction is all about wildlife and environment so plastic waste is a definite no-no.
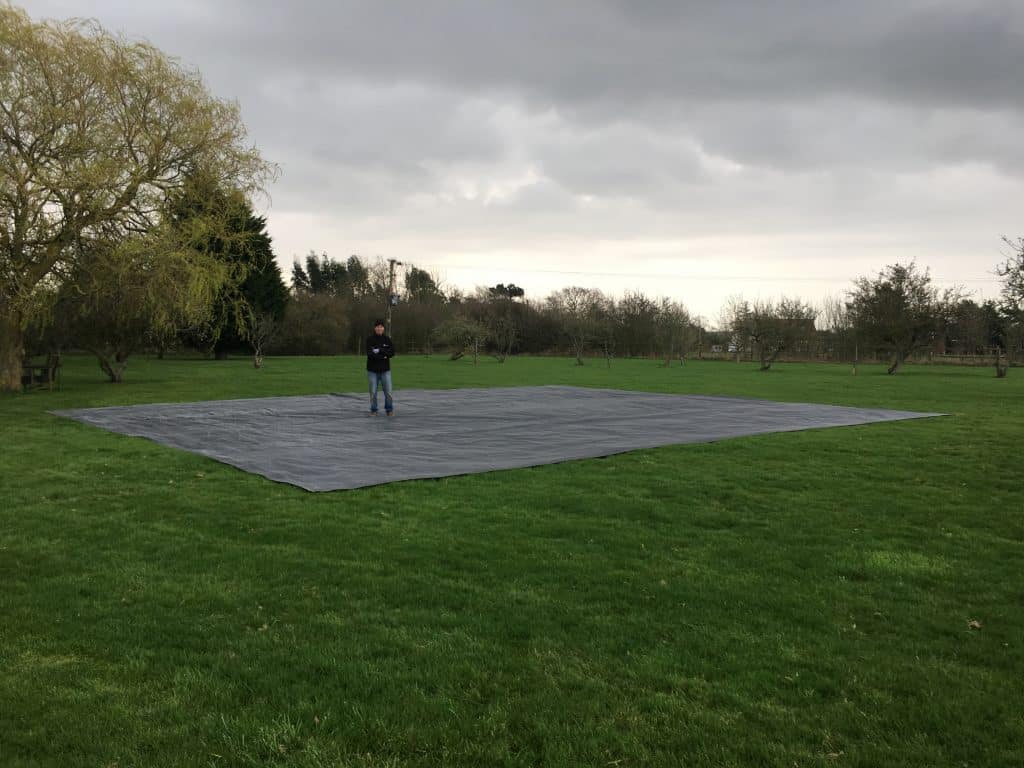
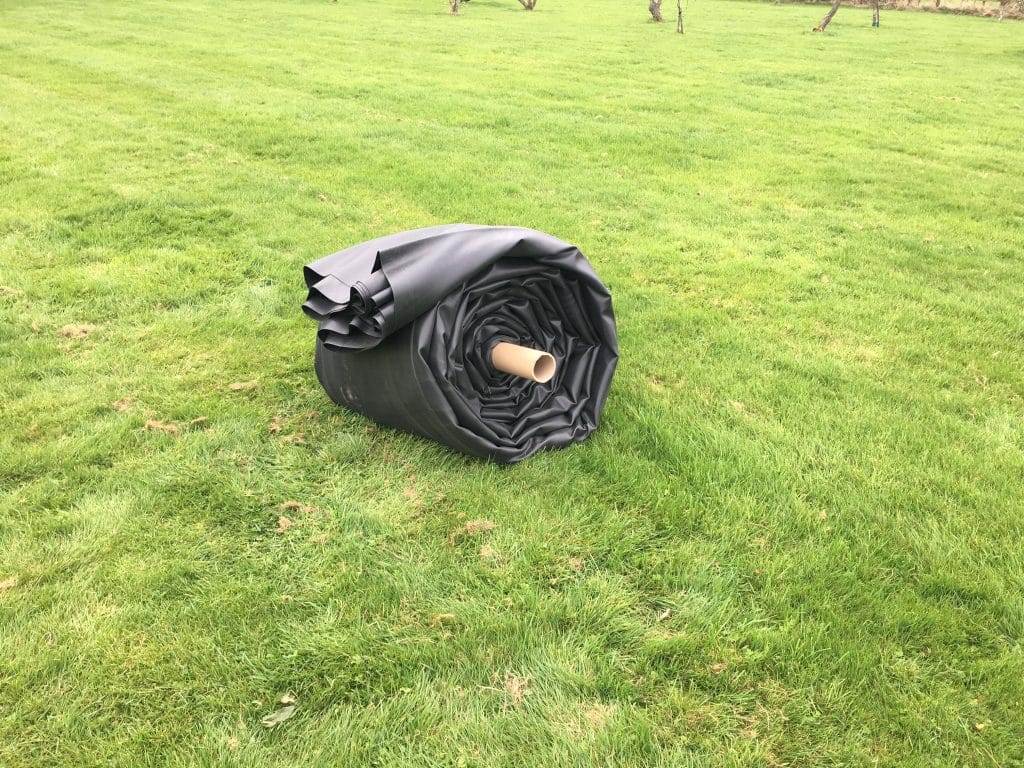
Here’s the pond liner spread out on the grass so that we could check it over and prepare it for installation. My Dad, Chris is standing on it. Don’t worry, we made him take his hobnail boots off first so he didn’t pierce the butyl. Dad is around 6ft tall – so you can get a feel for just how big the liner was. It was heavy too. Really heavy.
Watching my Mum making Christmas Pudding taught me how to fold pond liner
The bare ground beneath the pond has been smoothed by a layer of sand. Then there’s a fabric liner to make a protective layer before the buytl goes on. If ever you’ve made a steamed suet pudding (I haven’t but I’ve seen my Mum do it), you’ll know that the foil lid that sits on the pudding basin, has to be pleated. The pleats allow the lid to change shape as the pudding rises. Pond liner works on the same principal – only upside down. Because of the sheer weight of this liner, we had to devise a way to use the mini-digger to fold and pleat it. That was fun.
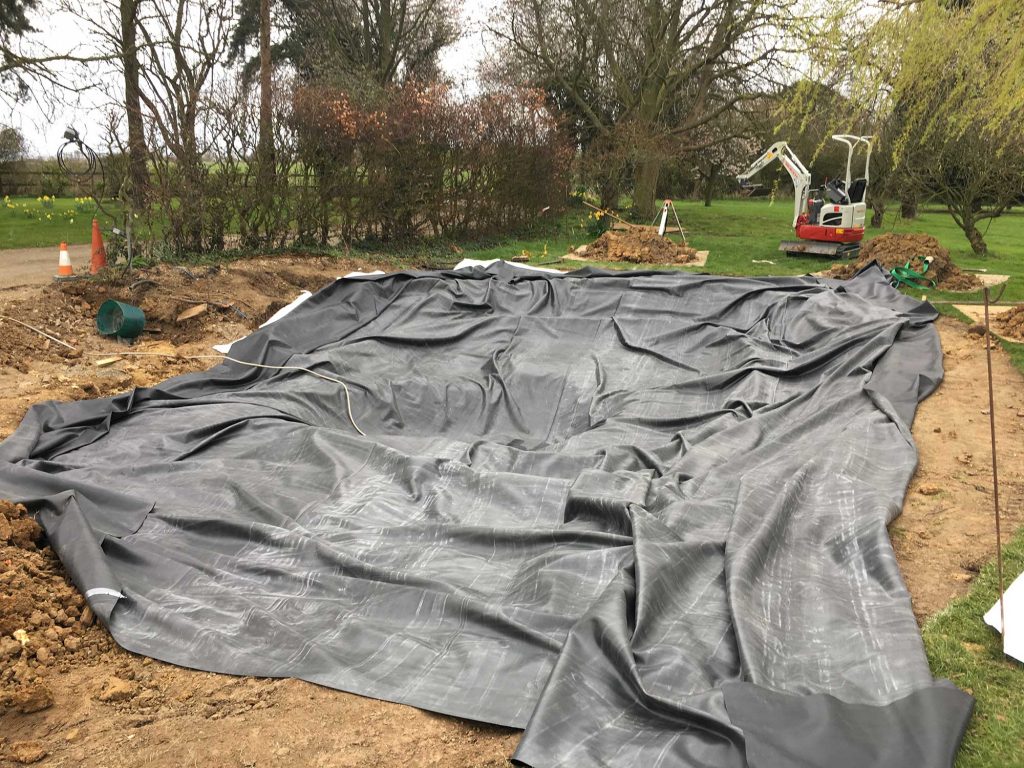
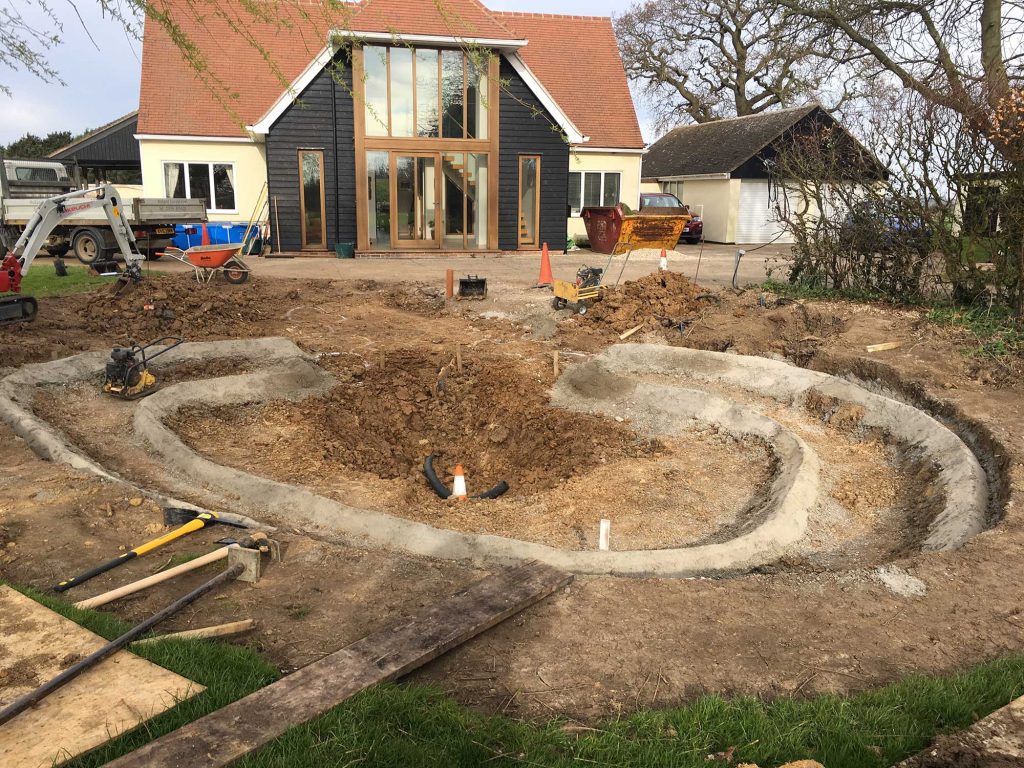
In the photo before this one, you could really see the pond construction taking shape. Now that the liner has been opened out, you can just see a big piece of black stuff with a dent in it. But things are about to get more interesting.
Step 4: The pretty bits
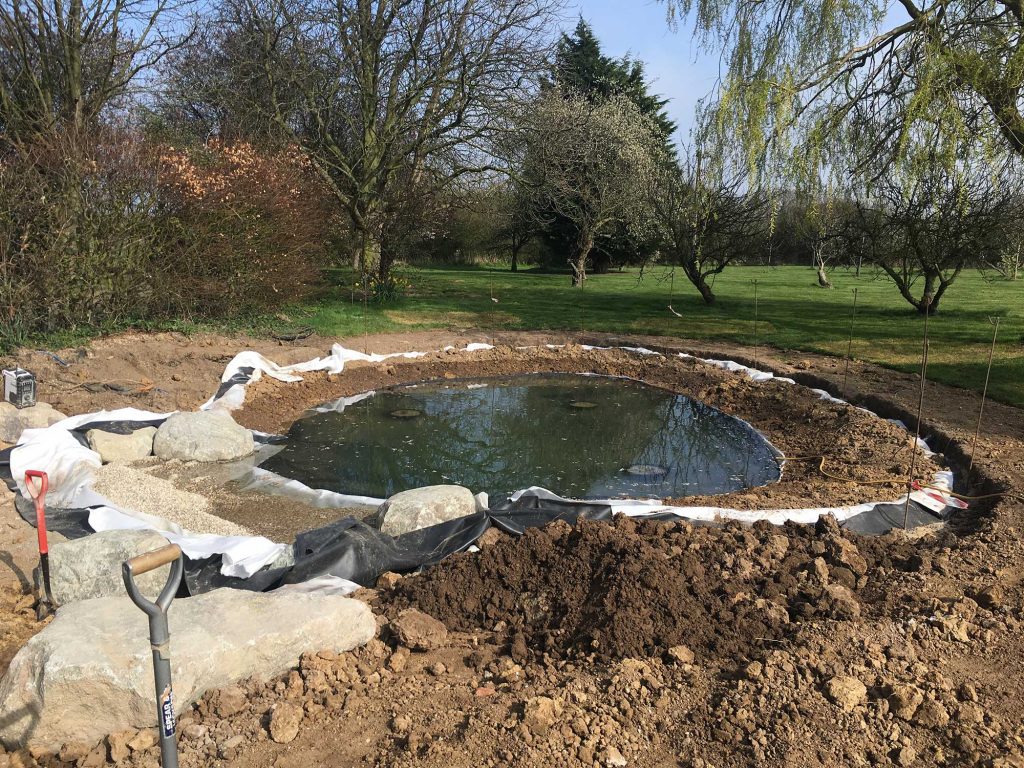
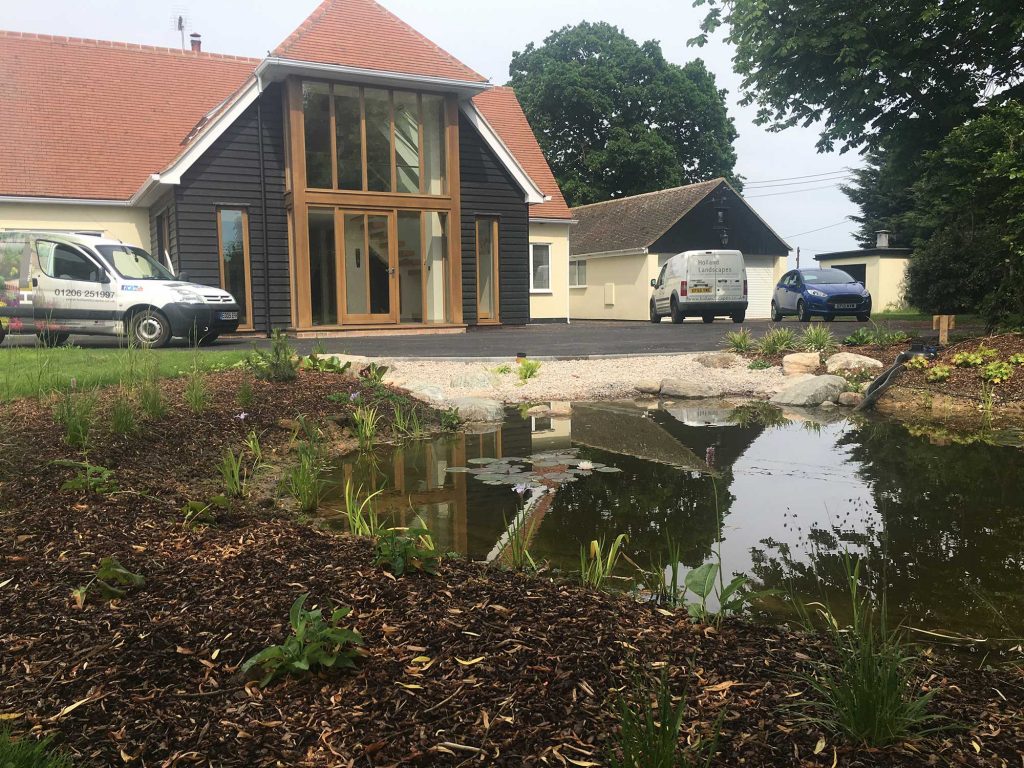
With the developing wildlife pond filled with water, we could all breath a big sigh of relief. It doesn’t leak and it is nice and level. No ugly exposed liner here. For the first time it was possible for the clients to visualise how their new pond construction would blend with the orchard and the rest of the garden.
Here you can see how the edges of the pond liner have been disguised with soil. This is more than just an aesthetic feature. The soil surrounding the pond will become permanently damp thus creating the perfect conditions for marginal plants to grow in.
You can see pots submerged in the water. These are water lilies. They tend to disappear for the winter and show themselves in late spring when the water temperature rises a little. This picture was taken in March or April. The daffodils in the far background are promising that summer is on its way.
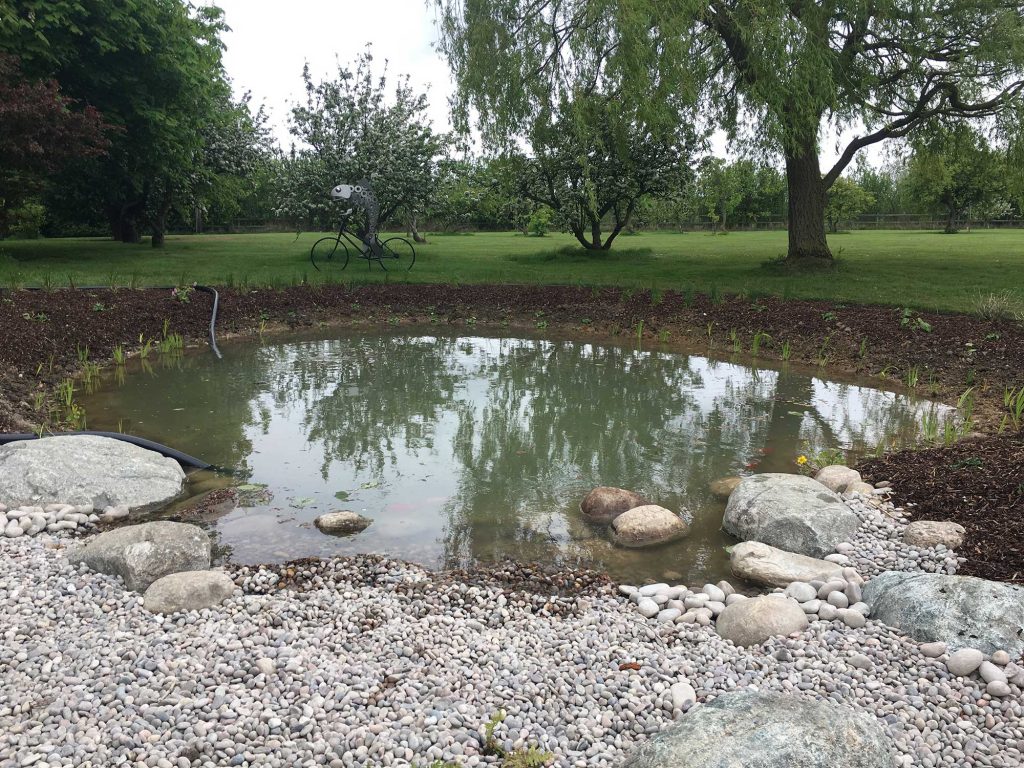
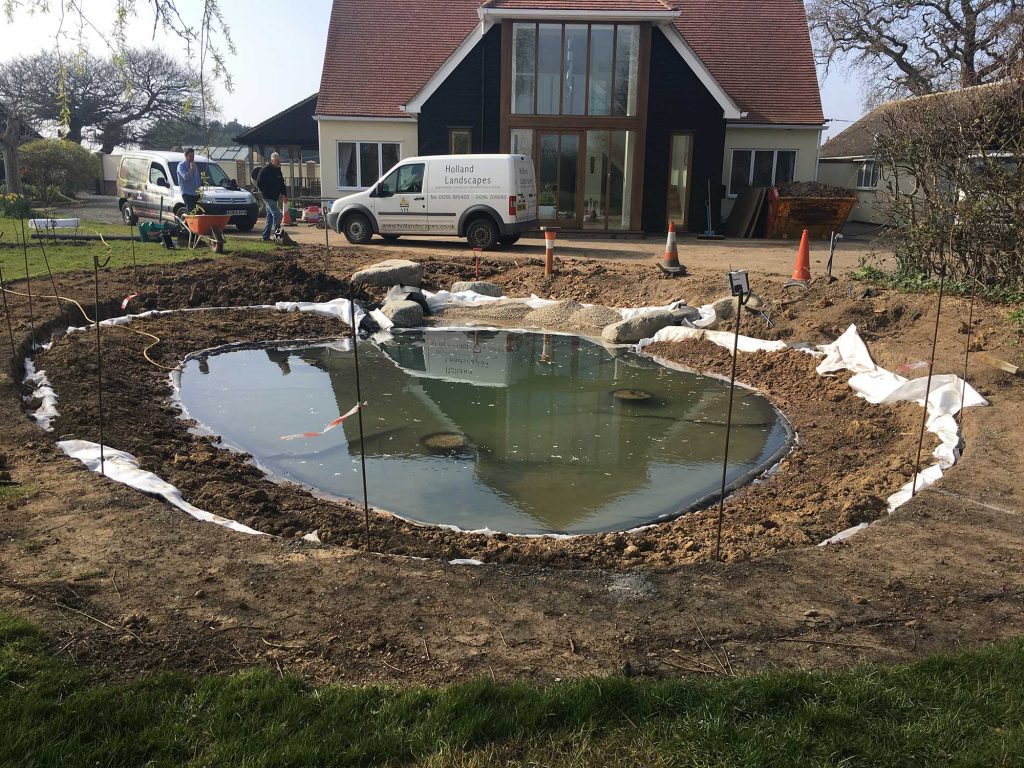
Heres’s the view from the house just after work has been completed. We built a little pebble beach so that the owners could walk down to the waters edge. Varying the sizes of the pebbles gives it a more natural look and feel.
The almost finished project. The water lily’s look happy, the planting has been completed and mulched and now we’re waiting for the planting to mature. To look at this pond construction now, you would never guess that it’s actually a piece of precision engineering. That’s the beauty of landscaping.
This wildlife pond project was designed by Tapestry Design Studios in Colchester. They’re one of several garden designers that we work with regularly. To learn more about the scope of their design projects visit tapestrydesignstudios.com
You may also enjoy reading……
Some other projects from the Holland Landscapes Portfolio
Sorry, the comment form is closed at this time.